
Jira Integration
The Jira integration enables bidirectional synchronization between Hashiro vulnerability findings and Jira issues. Security teams can push findings to development teams' Jira projects and receive status updates without leaving either tool.
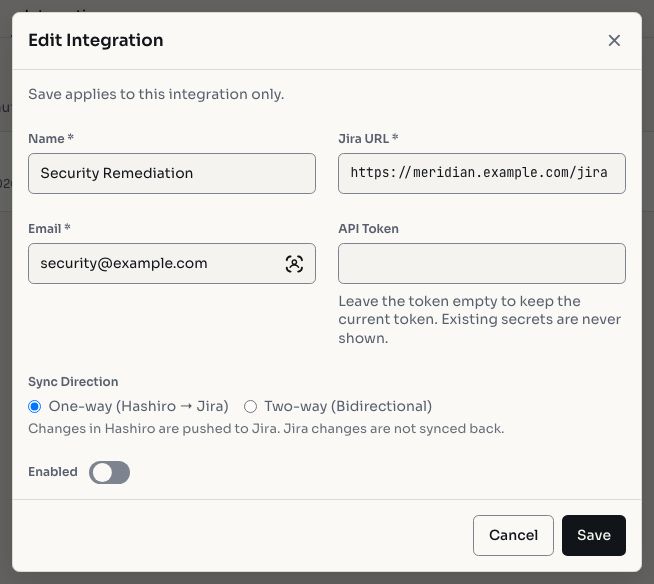
Screenshots use fictional demonstration data.
Setup
Prerequisites
- A Jira Cloud or Jira Server instance
- An API token (Jira Cloud) or credentials with project access
- Administrator or manager role in Hashiro
Creating the Connection
- Navigate to Organization > Integrations
- Click Add Integration and select Jira
- Enter your connection details:
- Jira URL: your Jira instance URL (e.g.,
https://yourteam.atlassian.net) - Email: the email associated with your Jira account
- API Token: a Jira API token generated from your Atlassian account settings
- Jira URL: your Jira instance URL (e.g.,
- Click Test Connection to verify
- Save the integration
Generating a Jira API token
In Jira Cloud, go to Account Settings > Security > Create and manage API tokens. Create a new token and copy it into Hashiro.
Project Discovery
Once connected, Hashiro can discover your Jira projects and their metadata:
- Projects: all Jira projects accessible with the configured credentials
- Issue types: available issue types per project (Bug, Task, Story, etc.)
- Priorities: priority levels defined in your Jira instance
- Custom fields: any custom fields configured in your Jira projects
Field Mapping
Configure how Hashiro fields map to Jira fields for each project.
Creating a Mapping
- Go to the integration detail page
- Click Add Mapping
- Select the Jira project and issue type
- Map Hashiro fields to Jira fields:
- Finding title > Jira summary
- Finding description > Jira description
- Severity > Jira priority
- Custom field mappings as needed
- Save the mapping
You can create multiple mappings for different Jira projects or issue types.
Editing and Removing Mappings
Update field mappings at any time to reflect changes in your Jira project configuration. Deleting a mapping stops future syncs but preserves existing links.
Synchronization
Pushing Findings to Jira
Findings can be synced to Jira in two ways:
- Full sync: synchronize all mapped findings at once
- Single-entity sync: push an individual finding to Jira on demand
When a finding is synced, Hashiro creates a Jira issue using the configured field mapping and stores a sync link between the two records.
Retest Comments
When a finding enters the retesting phase in Hashiro, you can push a retest comment to the linked Jira issue, notifying the development team of the retest status.
Webhook Sync (Jira to Hashiro)
Set up webhooks to receive real-time updates from Jira:
- Go to the integration's Webhooks tab
- Click Create Webhook
- Hashiro generates a unique webhook URL
- Configure this URL in your Jira project's webhook settings
When Jira issues are updated (status changes, comments, etc.), the webhook notifies Hashiro, and the corresponding finding is updated automatically.
Webhook security
Each webhook URL contains a unique identifier. Do not share webhook URLs publicly. You can regenerate or delete webhooks at any time.
Monitoring
Sync Status
View the current synchronization state from the integration dashboard:
- Total synced entities
- Last sync time
- Any sync errors
Sync History
Review a log of all synchronization events: pushes, pulls, webhook receipts, and errors. Useful for troubleshooting sync issues.
Sync Links
View all active links between Hashiro findings and Jira issues. You can remove individual links to disconnect specific findings from their Jira counterparts.
Per-Project Configuration
In addition to organization-level Jira configuration, individual Hashiro projects can have their own Jira settings, specifying which Jira project and mapping to use when syncing findings from that particular engagement.